

How To Draw A Side Pose
Cartoon heads are hard, there are many views that you need to tackle. People ordinarily start learning to describe the front end view beginning, then to side or 3/4 views. The side view tin wait very different than the front view and you lot may feel like it's completely different from drawing the front view. However, once yous've fix upwardly the proper guidelines, it can be pretty easy to draw information technology!
If y'all're interested in learning how to draw an anime head from the front view, I've made a post on information technology hither.
In this post, I will be showing yous how yous can prepare guidelines to draw an anime-styled caput in the side view. I volition talk briefly on how you can change up the proportions to draw an anime caput that is a lot cuter, in chibi style.
Try out the xxx Days Free Trial! The digital painting software for analogy, comics and animation!
Anime Caput Side View Guideline Construction Process
Let's get straight into information technology! Delight note that this is just how I create guidelines for my drawings. Different artists will accept different ways in which they construct their guidelines, some tin can simply Freehand everything!
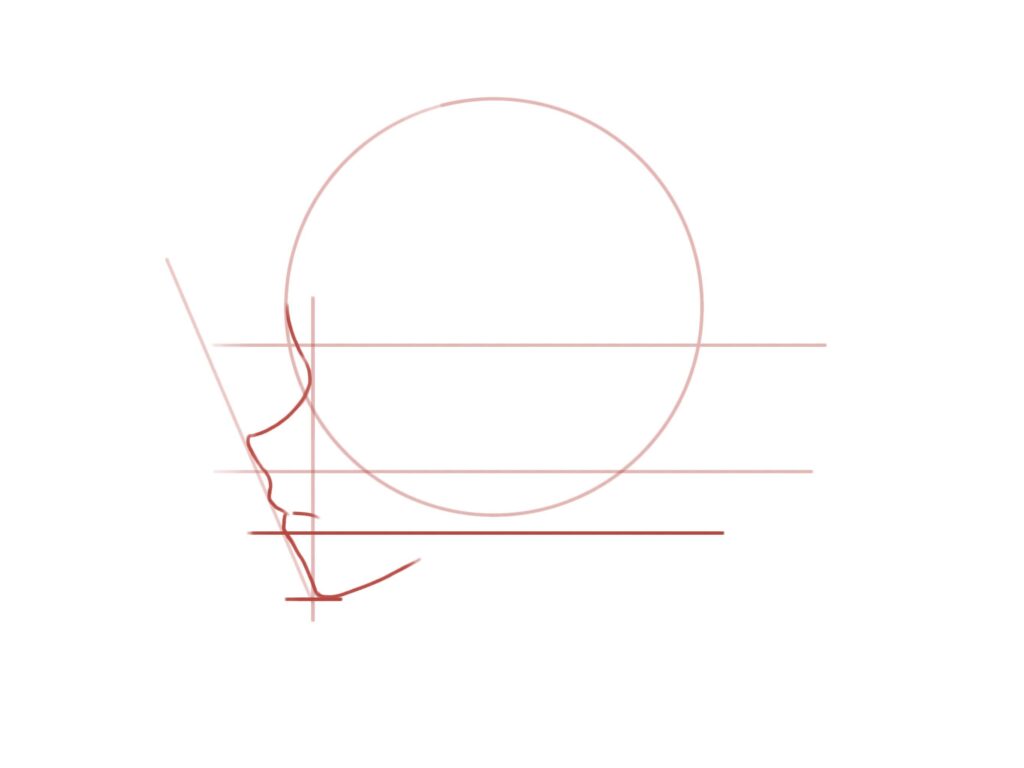
Showtime, as usual, depict a circle. Side by side, draw a vertical line downwards the left or right side of the circumvolve, this is where the caput will be facing. Now, make up one's mind where y'all desire the bottom of the mentum to be for your head. If you're drawing a more mature caput, the chin will exist longer; if y'all're drawing a younger person, the chin should be shorter. in this example, I'thou drawing a immature female, so the mentum is pretty curt.
Next, draw a horizontal line in the heart of the head (betwixt the peak of the head and the lesser of the chin. This line is where the top of the heart will be
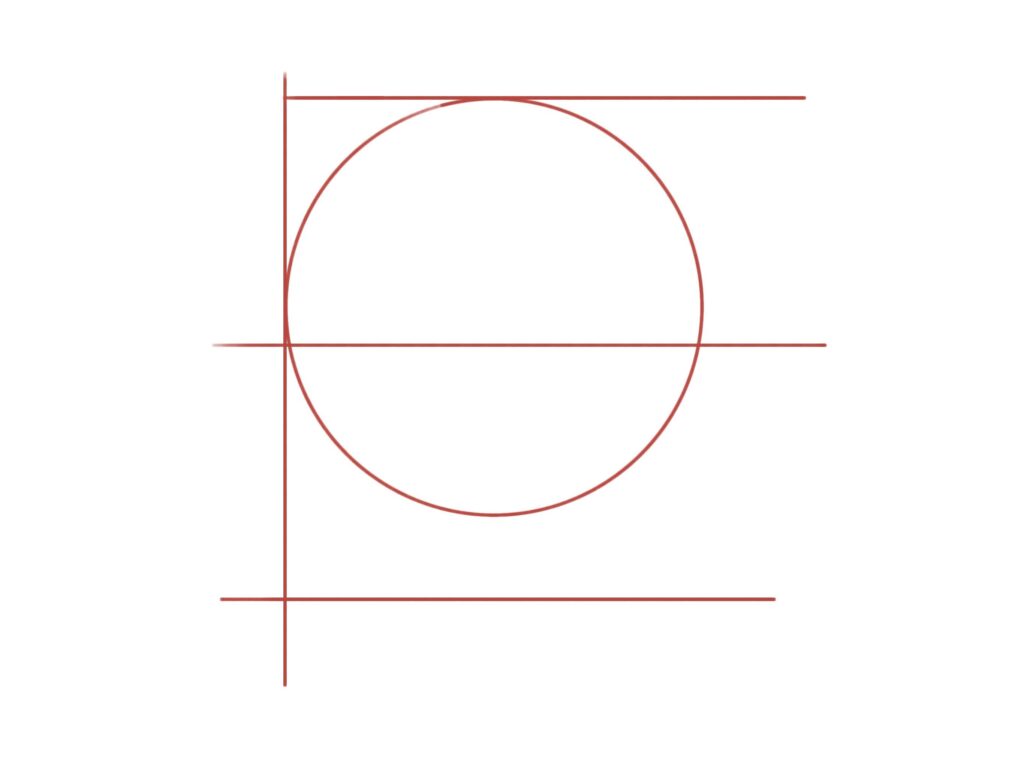
Draw another horizontal line betwixt the top of the optics and bottom of the mentum, this guideline is for the bottom of the nose.
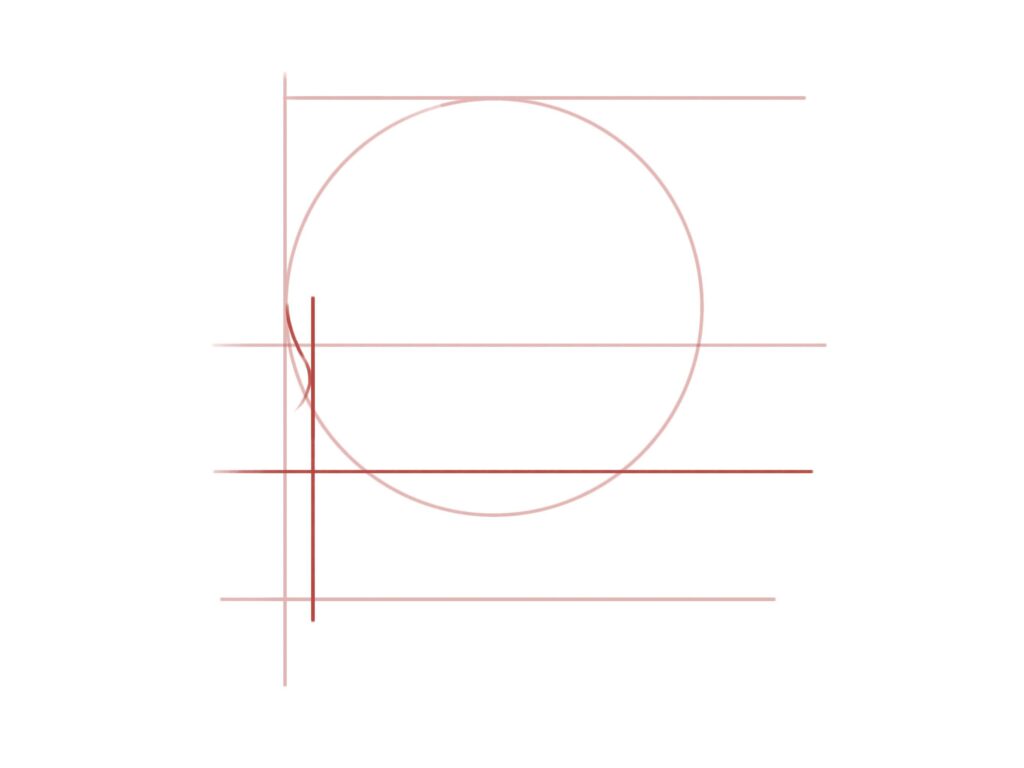
Draw a horizontal line slightly into the face from the vertical line, this line should cutting across the bottom line for the chin and the eyes. Add a slight inwards curve around where the eye is. The intersection between the guideline for the lesser of the chin and the vertical line volition be where the tip of the chin touches.
Where the superlative of the eyes is, draw a slight dip inwards the head.
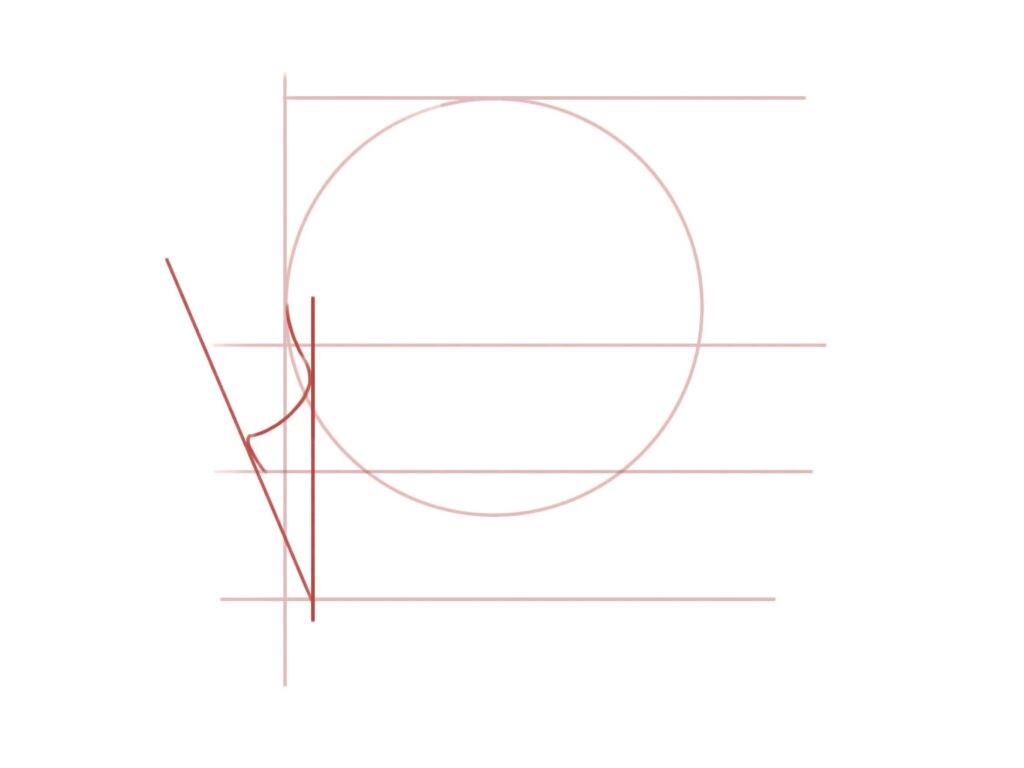
From the bottom of the chin, draw a line angled outwards roughly as shown in the image below. Use the guideline to add in the nose. Connect the bottom of the dip to the tip of the nose. The tip of the nose is touching the guideline. The lesser of the olfactory organ is touching the guideline for the bottom of the nose. The nose shape and the angle for the guideline can vary depending on age, gender, your preference etc.
Add another horizontal line between the bottom of the nose and chin, this is the guideline for where to place the oral cavity. The mouth should be slightly in a higher place this guideline. When adding in the oral fissure shape, make sure that only the tip of the top and bottom lips bear on the angled guideline.
From the lesser of the oral cavity to the chin, there's a slight inward curve.
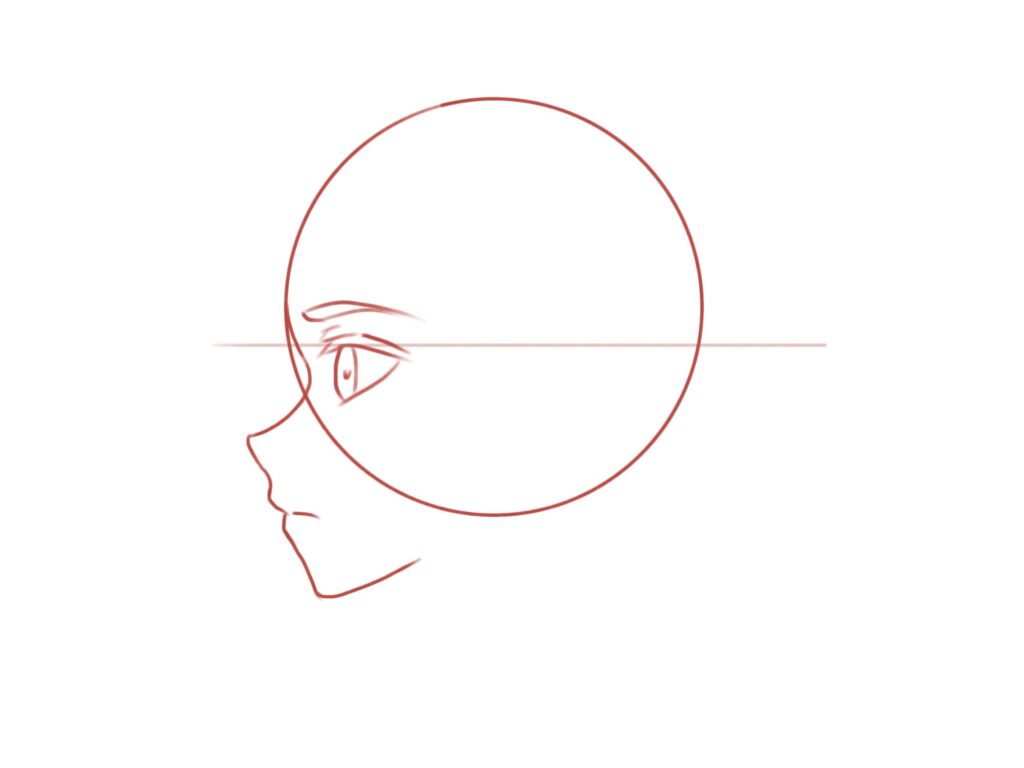
At present you accept a basic shape for the head! Fourth dimension to showtime refining and adding in details.
Add in the eye, the top of the eye should exist around the guideline we made earlier for the heart of the caput.
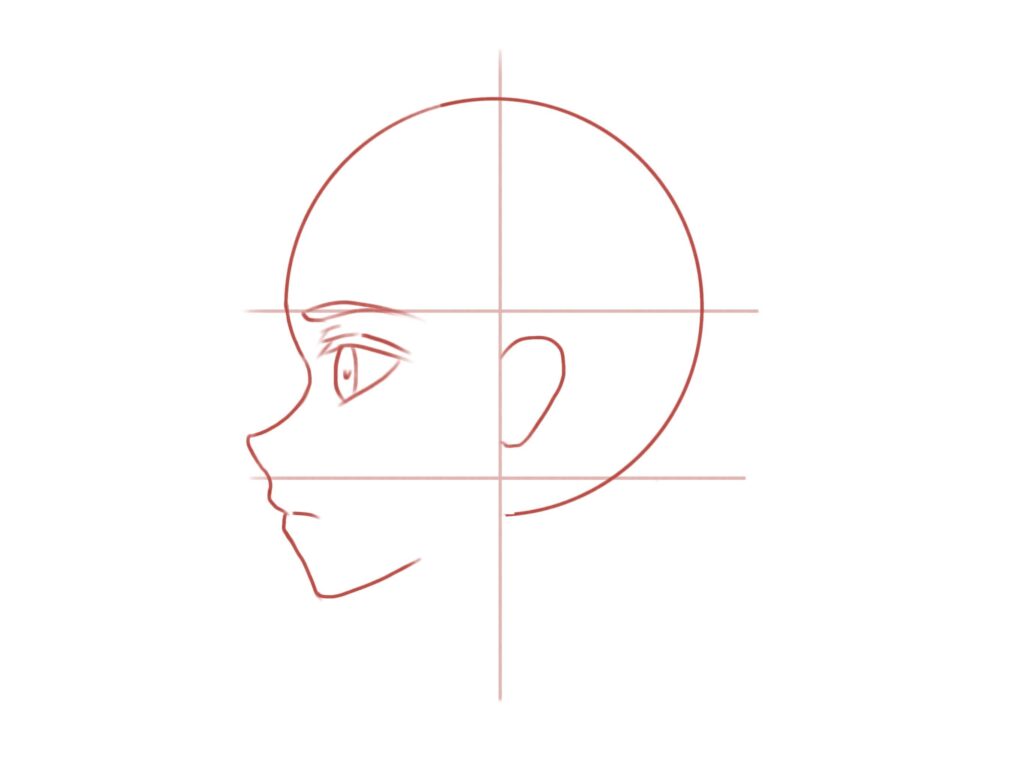
Draw another vertical line down the centre of the circle, this will be the guideline for placing the ear. The ear is roughly between the eyebrows and bottom of the nose.
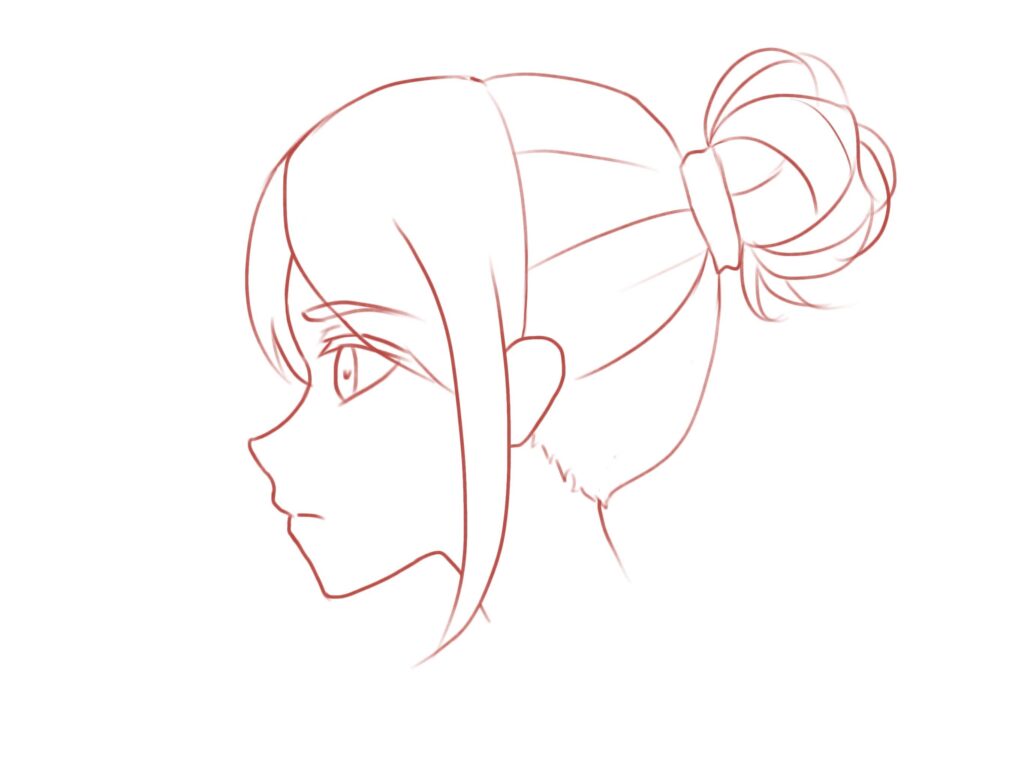
Finally, add together in the hair and neck, yous've fatigued a side view of an anime head! Note that hair has book. I've put some space betwixt the hair and the caput. For the neck, information technology doesn't go vertically direct down, it is angled.
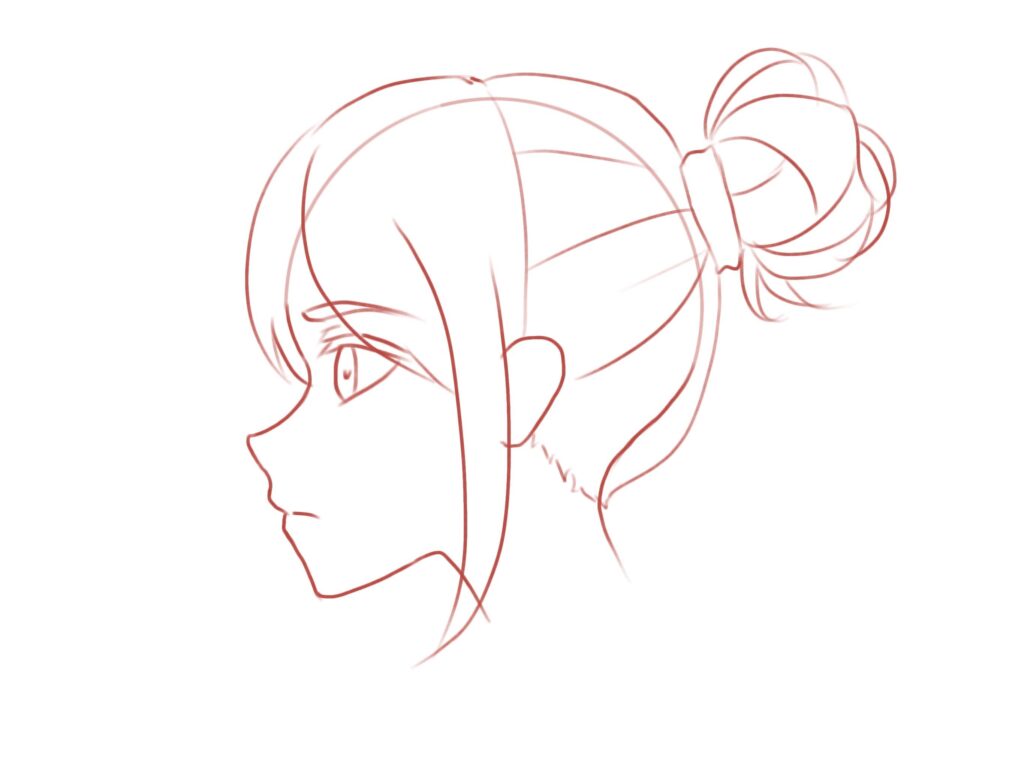
Don't forget to erase overlapping lines! I've besides angled the chin alittle more.
Chibi Style Side View Head Guidelines
For cute chibi styled heads, the area below the eyes will be a lot shorter and the features will be a lot rounder, thus cuter. The eyes should also be bigger as well. Beneath are some pins from Pinterest for your reference. I will exist making more detailed tutorials on how to draw chibi styled heads in the hereafter.
Start your digital painting journey with Clip Studio Pigment!
Try out the Clip Studio Paint 30 days free trial!
It is the app for artists, designed for drawing & painting. Open up the door to creativity without limits, with specialized features for illustration, comics, manga, webtoons, concept fine art, design, and blitheness built-in.
It is the main software that I employ for my digital drawings. Information technology is a cheaper(one-time payment!) alternative to Photoshop.
I promise you've enjoyed reading this postal service and has establish it useful. If you lot purchase anything through the affiliate links that I've provided, I'll get a small amount of commission (at no actress toll to you!) which helps me continue writing art-related blog posts and tutorials like this one.
You may too be interested in:
- How to draw the head and face up – anime style guideline forepart view tutorial
- How to draw anime chibis – full general features
- Digital painting for beginners

Support me on Ko-fi! Your donations and support mean a lot to me and it helps me keep doing what I'one thousand doing!
Similar my artworks? You can get them in prints, stickers or badges form on my Etsy shop!
Follow me on Instagram to see more of my art!
I offering art commissions!

Source: https://maryliart.com/how-to-draw-the-head-and-face-anime-style-guideline-side-view-drawing-tutorial
Posted by: gibbonsnale1948.blogspot.com
0 Response to "How To Draw A Side Pose"
Post a Comment